


Android is an excellent mobile operating system because it is simple and approachable for everyone out of the box. However, for Android users ready to invest time and effort, the Android operating system offers a mind-blowing level of customizability and features. This versatility makes Android the perfect mobile operating system for first-time and pro users.
This guide lists the best Android tips and tricks to help you use your Android smartphone like a pro. We kept these tips platform-agnostic, so you can use them on the best Android smartphones, regardless of the brand.
Table of Contents
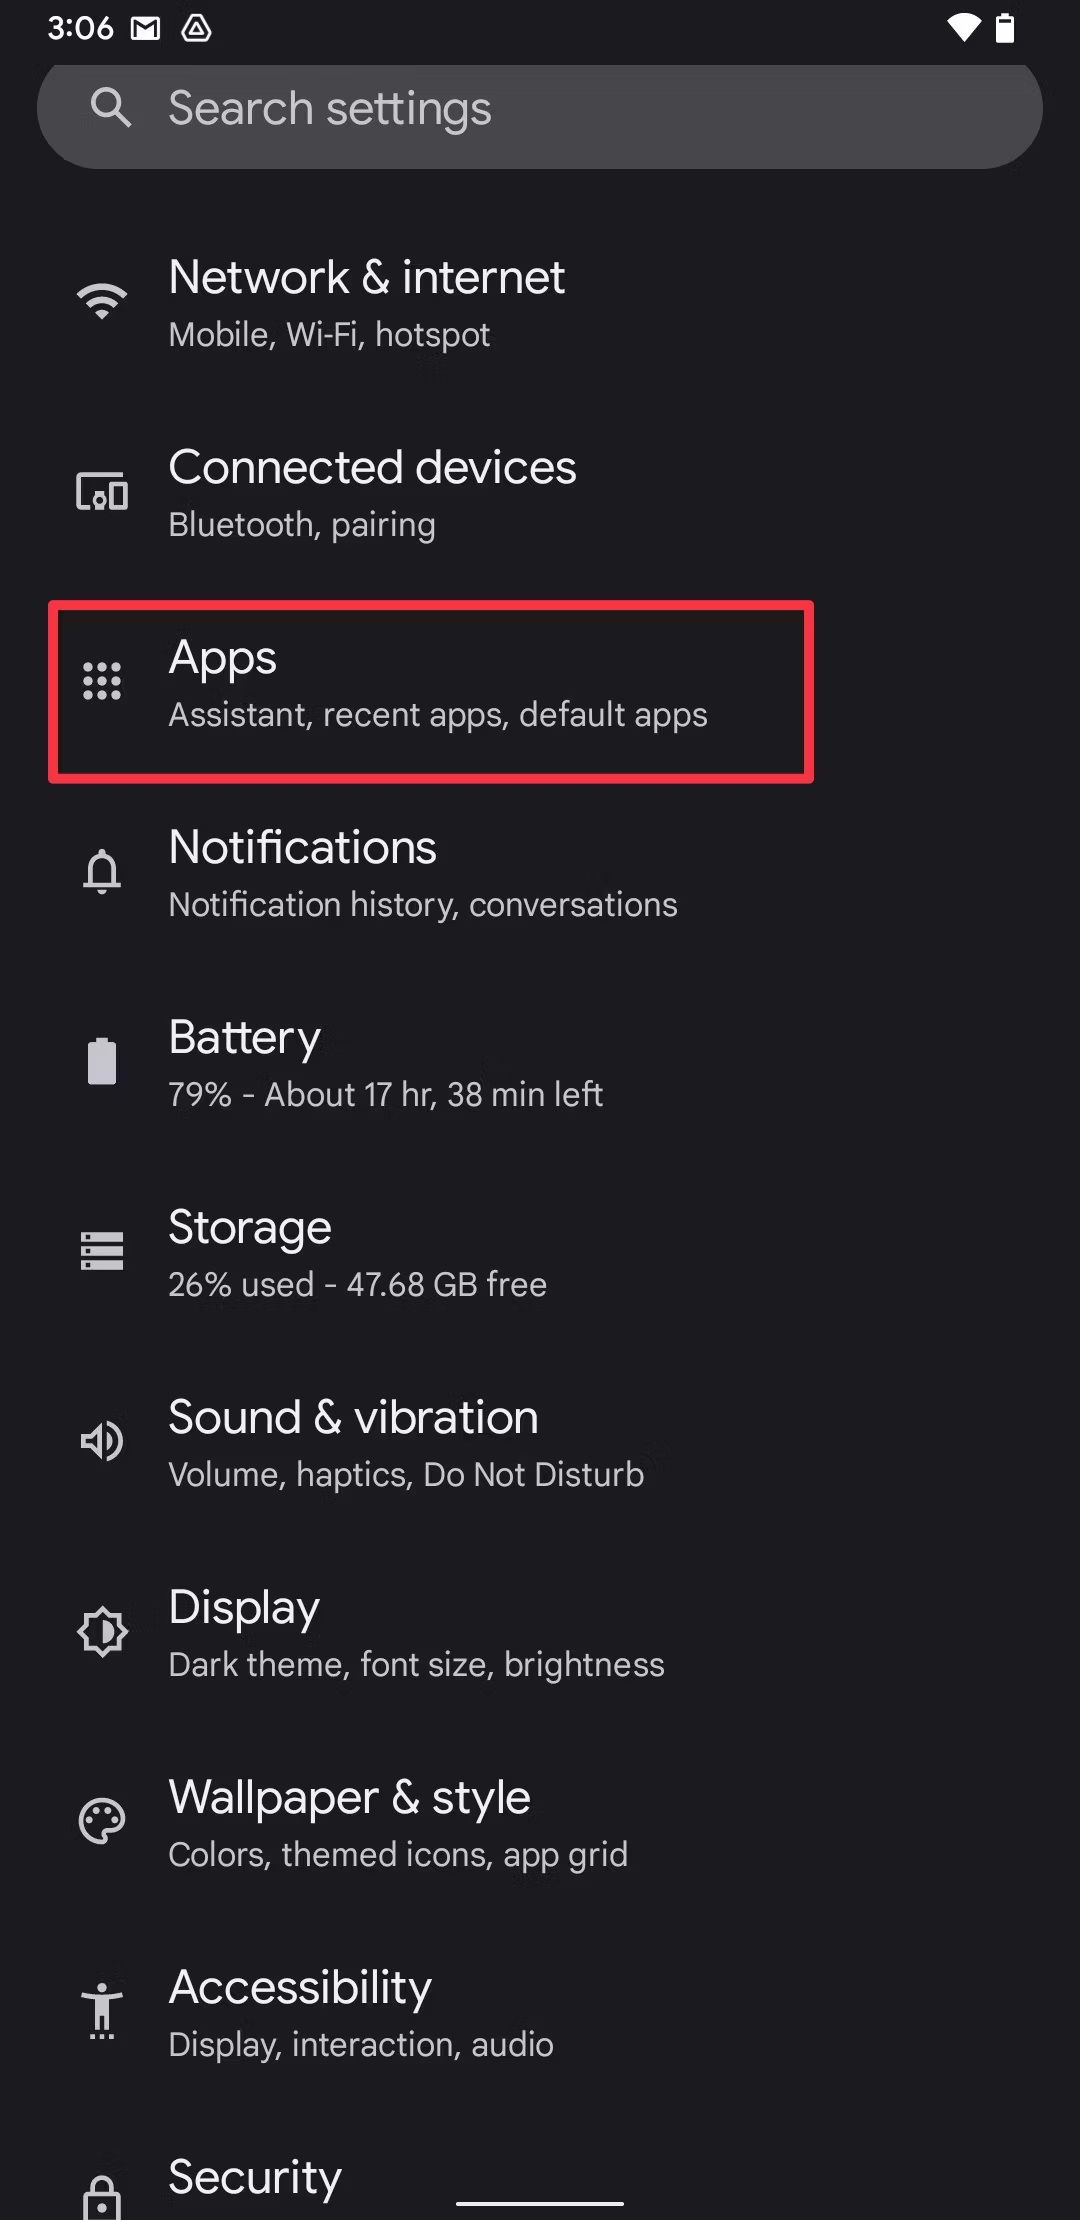
1.Android tips and tricks: Change Default apps


2. Android tips and tricks: Use third-party launchers and icon packs
Users adore the Android operating system for its high level of customizability. The default launcher on an Android phone empowers users to personalize nearly every aspect, including the option to utilize custom icon packs for app icons. In cases where your phone lacks support for this feature or you desire a distinctive appearance, consider using third-party launchers.
The Google Play Store offers a plethora of third-party app launchers, providing you the flexibility to tailor your Android phone according to your preferences. For a straightforward approach, the Niagara launcher stands out as an excellent choice. If you have a penchant for theming, the Hyperion launcher is tailored for your needs, while the timeless Nova launcher is a reliable classic. To assist you in finding the ideal launcher for your preferences, we have compiled a list of the best Android launchers that you can explore.
For those looking to elevate customization even further, explore the finest custom icon packs available for Android. Ranging from minimalistic to skeuomorphic and extravagant, these icon packs enable a complete transformation of the visual aesthetic of your Android device.
3 Change the app language
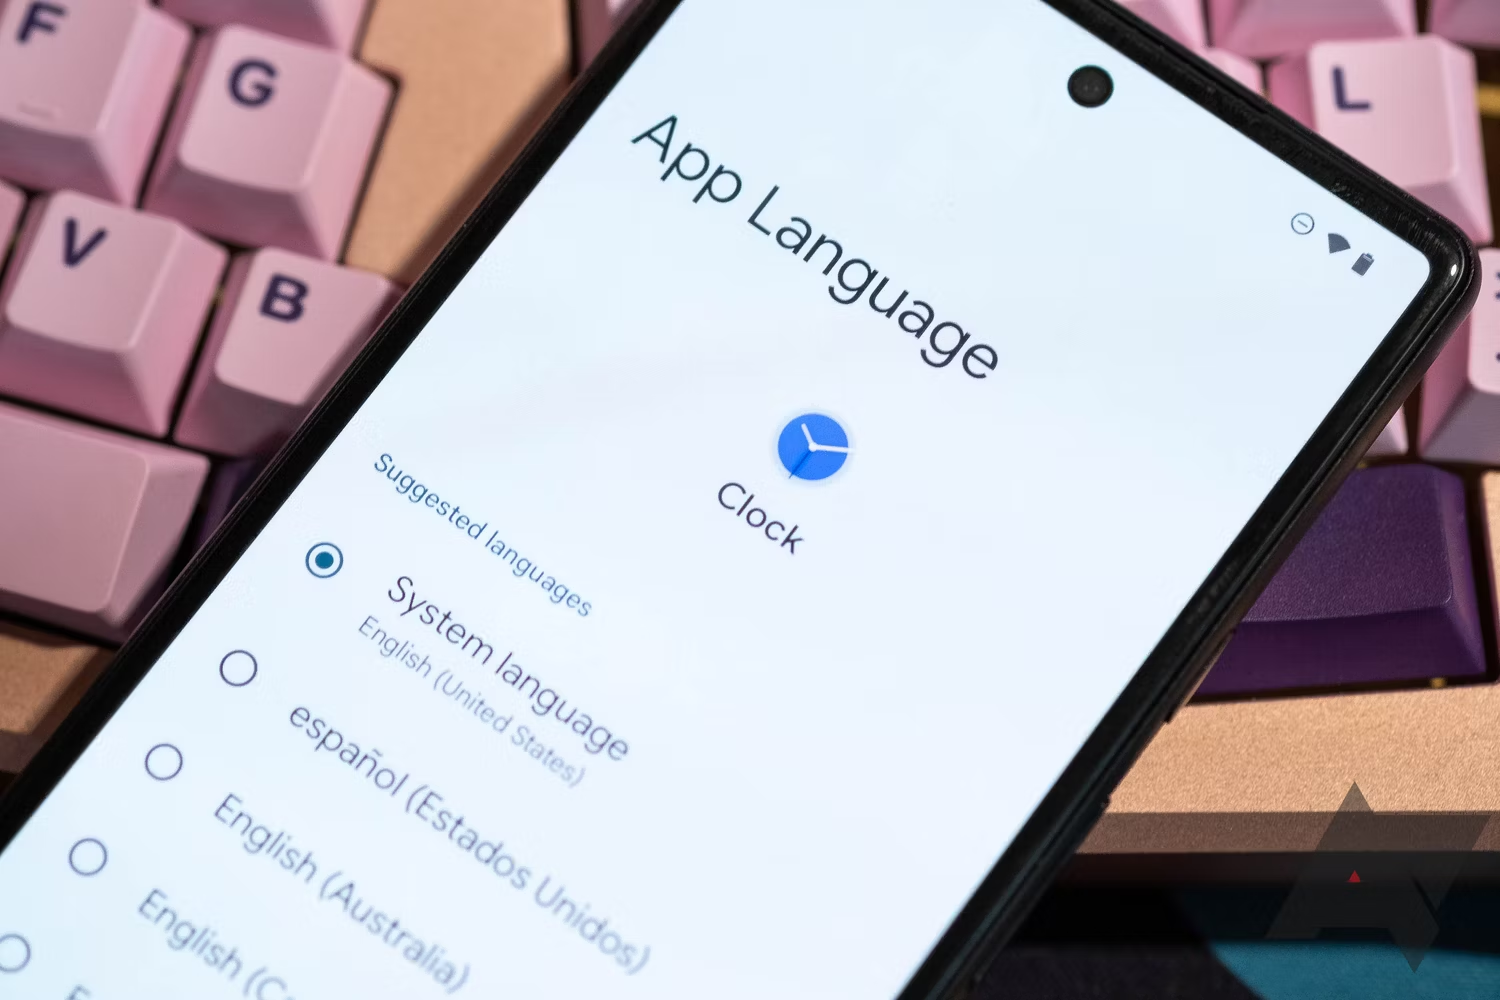
Android has consistently provided users with the ability to adjust the display language of their phones to suit their local language. With the Android 13 update, Google introduces a groundbreaking feature that allows users to customize the display language on an app-by-app basis. This innovation enables users to maintain the entire phone UI in English while selectively changing specific apps to their local language, making it a game-changing feature for those who are multilingual.
To modify the app language for a specific application, navigate to the Settings app and go to System > Languages & Input > App Languages. The App Languages option becomes visible only if you have added multiple languages to your device. Additionally, it’s important to note that app developers need to support this feature, so there might be a waiting period before your preferred app fully supports your local language.
4 Customize the quick settings
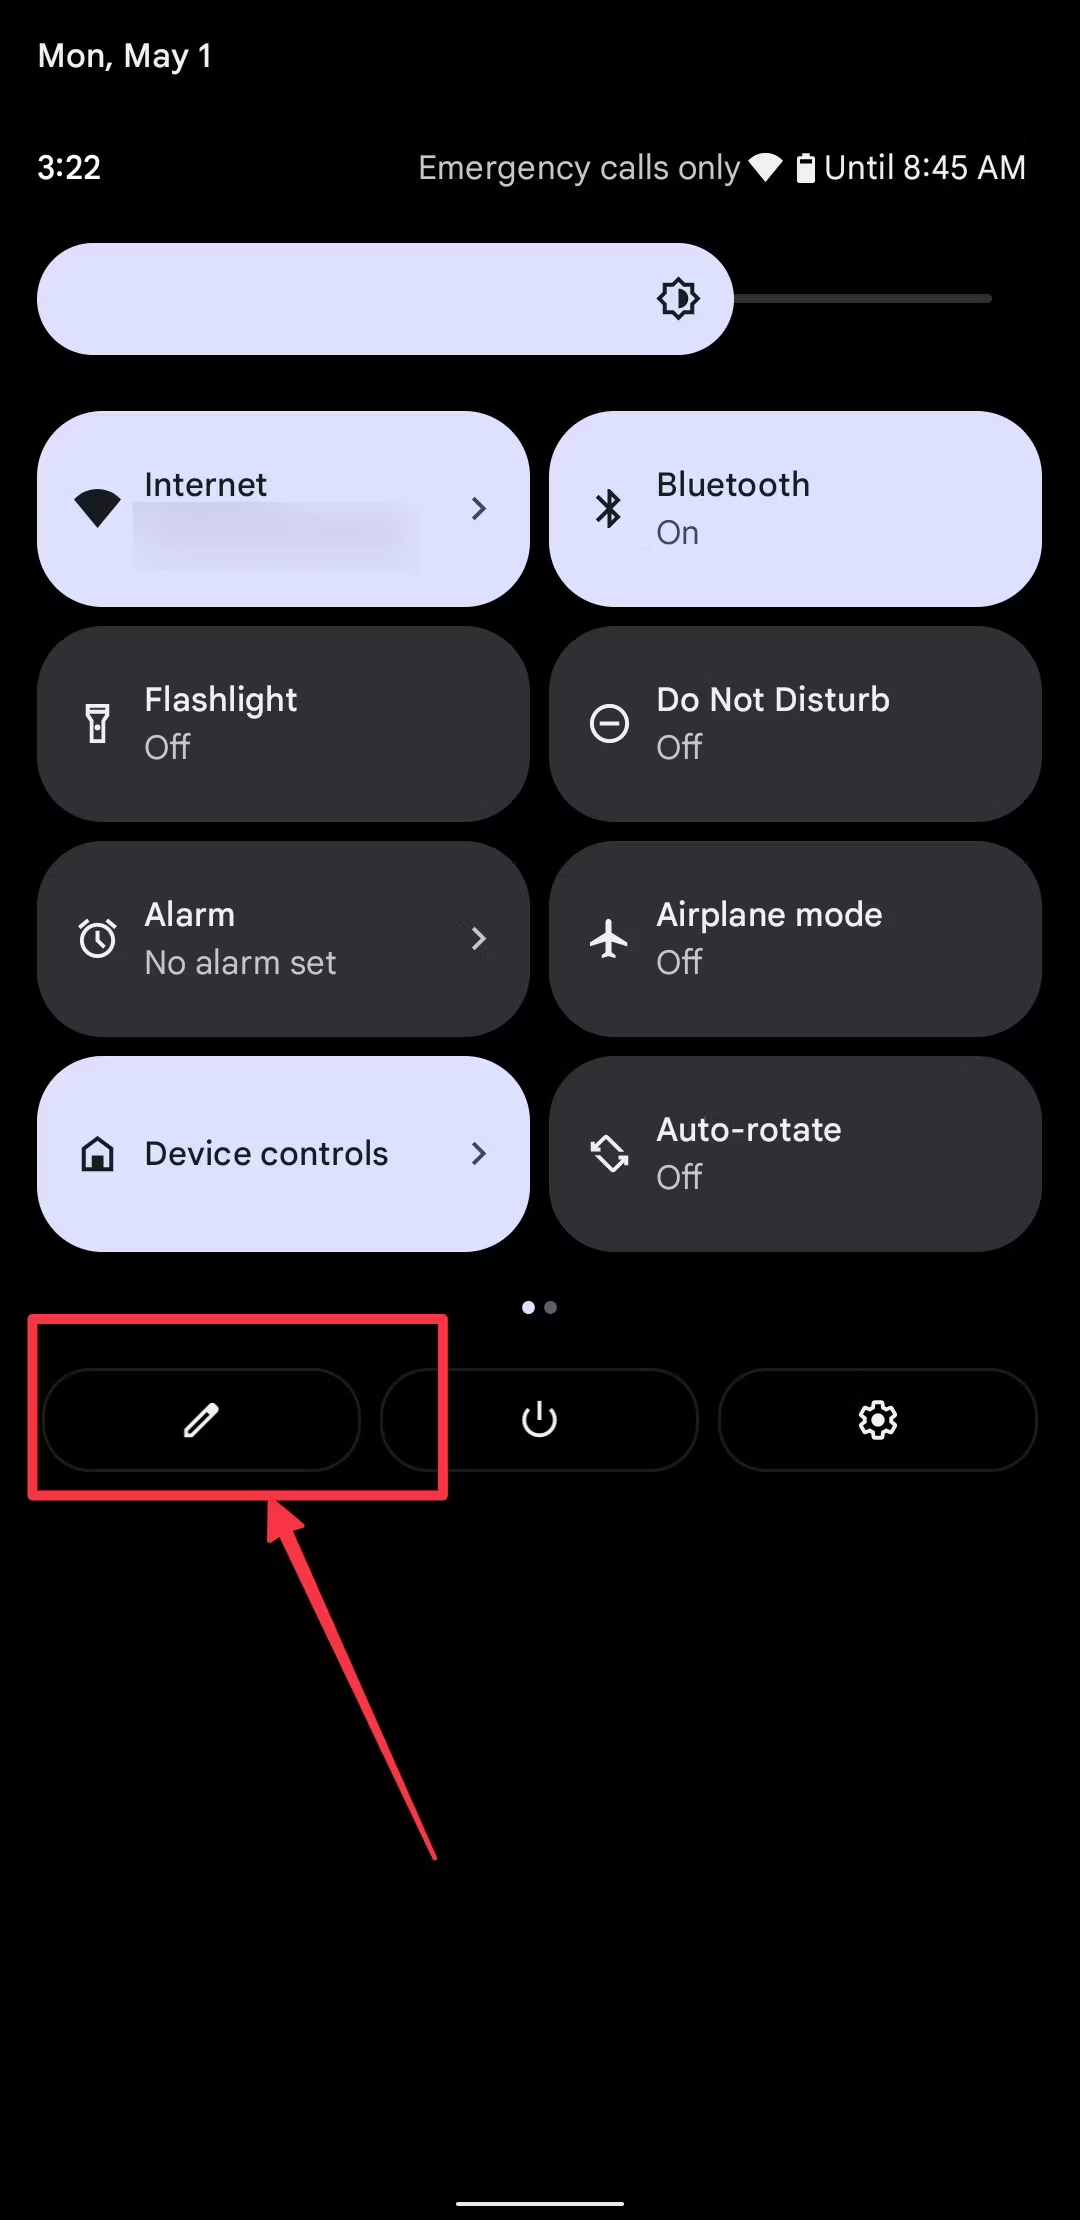
The quick settings page on Android serves as the optimal location for swiftly accessing essential settings such as Wi-Fi, Bluetooth, Battery Saver, and others. Over time, Android has introduced numerous quick setting toggles, potentially requiring users to navigate through multiple pages to find a specific setting. Android offers the flexibility to customize the Quick Settings page to align with individual preferences. To initiate customization, swipe down twice to unveil the quick settings page and tap the Edit button. Subsequently, hold and drag the tiles to rearrange them according to your needs.

5 Leverage widgets for easily accessible information
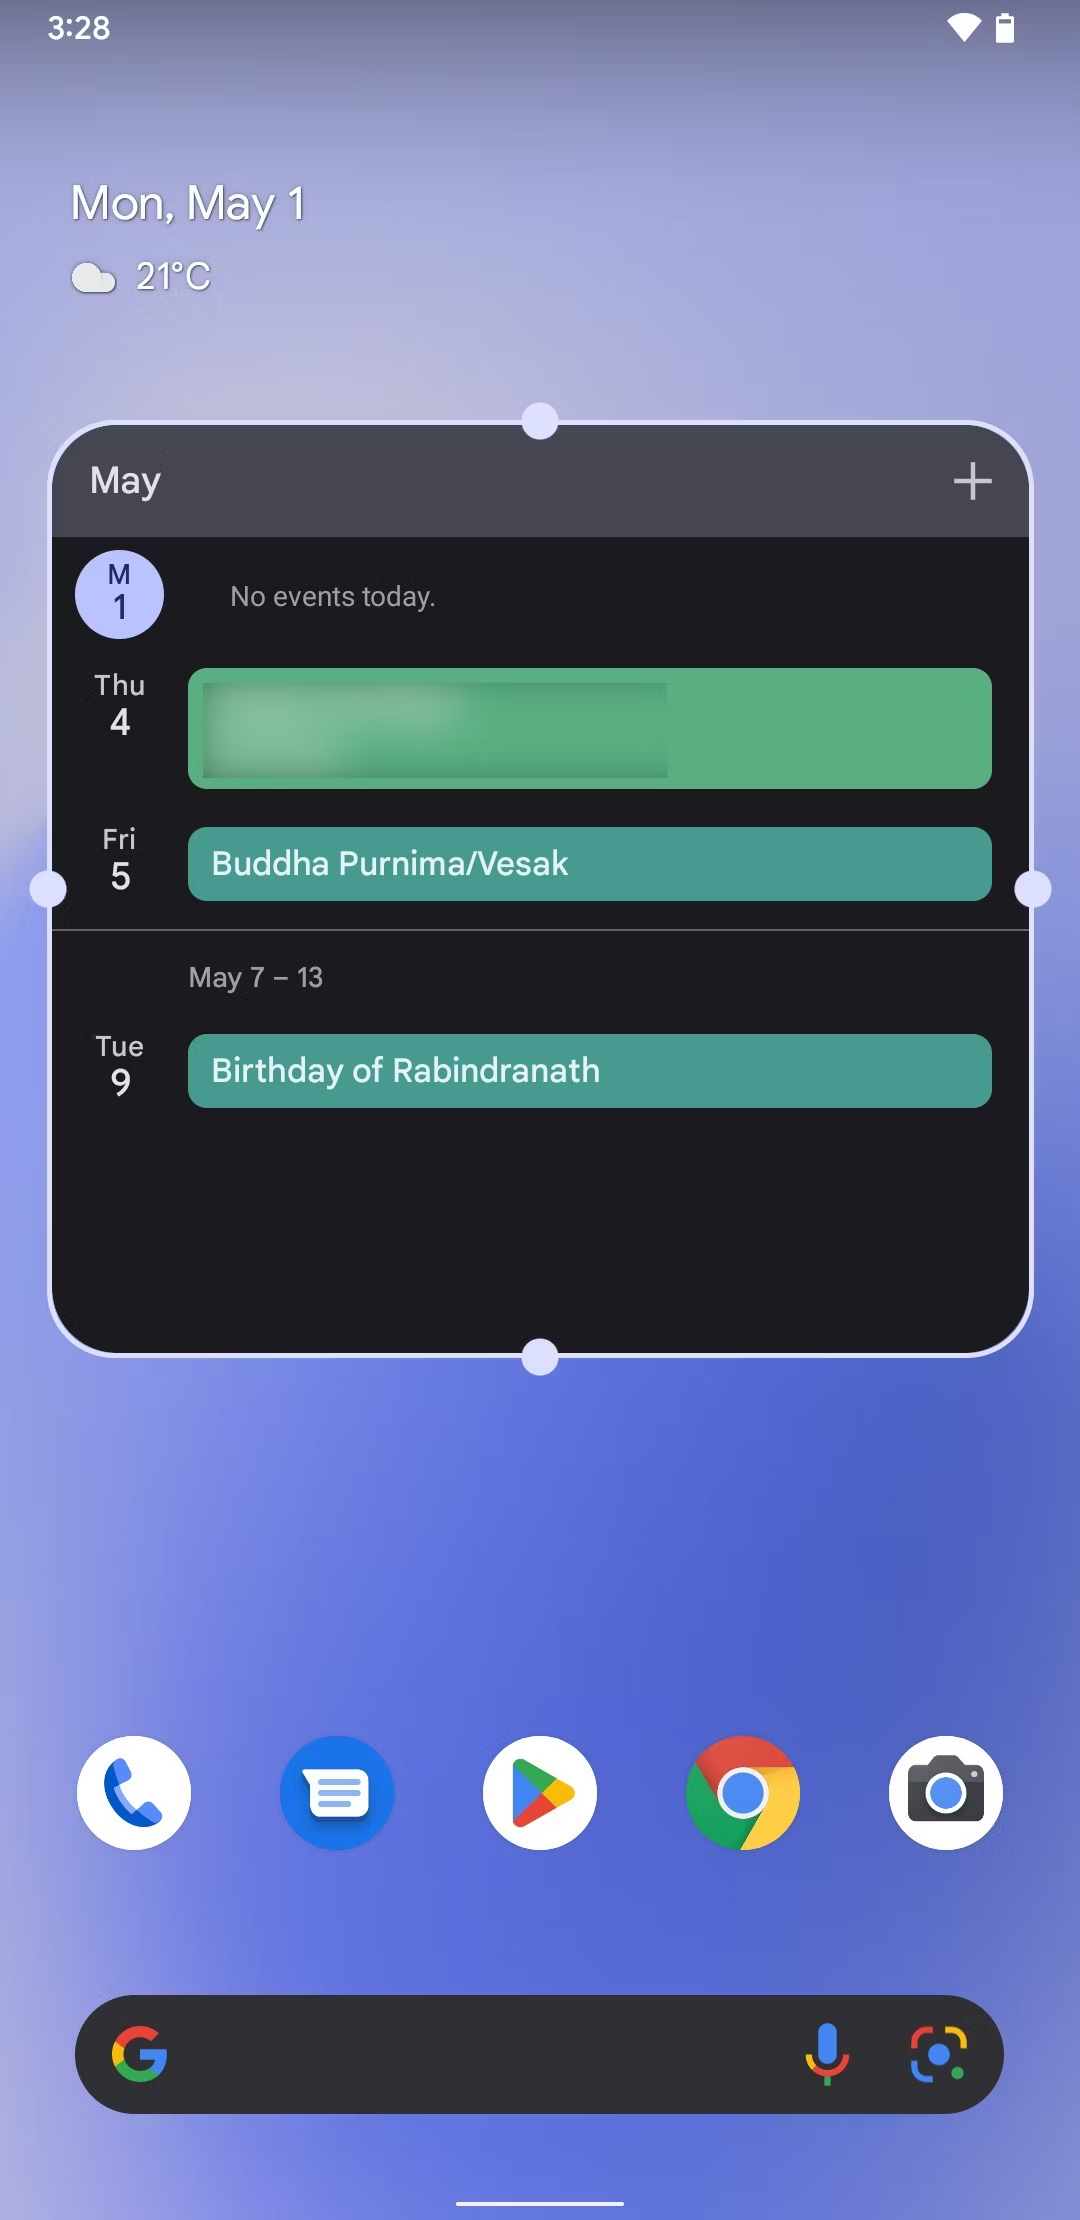
Android widgets offer a convenient way to showcase at-a-glance information. The majority of top Android apps provide widget support, enabling you to display details such as calendar events, tasks, notes, weather updates, clocks, and more. Widgets are particularly useful when you prefer not to continually open apps to check items like upcoming appointments.
To incorporate a widget onto your Android homescreen, perform a long-press on the homescreen and select the Widgets option. This action reveals a list of apps on your phone that support widgets. Tap an app to unveil all available widget options, and then touch and hold a widget to add it to the homescreen. Additionally, you have the flexibility to drag and resize the widgets as needed.


6 Optimize Quick Tap for Swift Actions
If you own a Google Pixel phone, take advantage of the Quick Tap feature for efficient tasks like capturing screenshots, media playback control, notification display, and more. Enable this feature on Pixel 4a or later by navigating to Settings > System > Gestures > Quick Tap to initiate actions.
7 Mastering Google Assistant
Elevate your Android experience by familiarizing yourself with Google Assistant. This powerful tool enables diverse functions, including information retrieval, music playback, calling, messaging, device and smart home control, routine setting, and more. Activate Google Assistant by using the voice command “Hey Google” and explore its capabilities for a more streamlined experience.
8 Activate Notification History
Prevent accidental dismissal of notifications by activating the notification history feature introduced with Android 11. To enable this on your Android smartphone, access Settings > Notifications > Notification history and toggle on the Use notification history option. This ensures you can conveniently review past notifications.
9 Manage App Notifications
Despite Android’s efficient notification management, unwanted notifications can still clutter your panel. Silence specific app notifications either through the notification panel by long-pressing and choosing the appropriate option or by navigating to Settings > Notifications > App Settings. Fine-tune your notification preferences using the notification channels feature.
10 Enable Find My Device
Safeguard your device and locate it effortlessly by activating the Find My Device feature. Access
Settings > Security > Find My Device and toggle on the Use Find My Device option. This feature not only helps you locate your device but also provides options for remotely securing and erasing its contents.
11 Integrate Android with Windows PC
Enjoy seamless integration between your Android and Windows PC with the Phone Link app. This application facilitates tasks like viewing photos, receiving notifications, handling calls, replying to messages, and even utilizing Android apps on your PC.
12 Install Apps Outside Google Play Store
While the Google Play Store is the primary source for app installations, explore alternatives like Amazon Appstore and APK Mirror for additional apps. Android allows installations from third-party sources, provided you download APK files from trusted platforms.
13 Eliminate Unwanted Apps (Bloatware)
Optimize your device’s performance by uninstalling unwanted pre-installed apps. While Google Pixel phones maintain a clean experience, other OEM partners may include unnecessary apps. Remove these apps to free up space and improve device efficiency.
14 Quick Launch Camera
Never miss a photo opportunity by mastering the quick launch camera feature. On most smartphones, including Pixels, OnePlus, and Samsung, double-click the power button to swiftly access the camera. Utilize volume keys for capturing shots and long-press for video recording.
15 Secure Private Photos
Safeguard your private photos by utilizing password-protected vaults. Features like Google Photos’ Locked Folder or Samsung Galaxy’s Secure Folder, found in the Biometrics and security section of the Settings app, offer secure storage for personal files.
16 App Pinning for Security
Ensure privacy when sharing your phone by utilizing Android’s app pinning feature. Access Settings > Security > App pinning to enable this feature, restricting users to a single app without access to other functionalities.
17 Password Protection for Shutdown
Enhance device security by requiring a password for shutting down your phone. Samsung’s OneUI offers the Secure Lock feature, which prevents unauthorized shutdown attempts. Activate this feature in Settings > Lock Screen > Secure lock settings.
